Inside a Full Roof Replacement in Bellevue
What happens on-site from tear-off to final walkthrough on a Bellevue reroof.
A full replacement moves through scheduled tear-off, deck inspection and re-nailing, underlayment and flashing work, then field shingles, hip and ridge caps, cleanup, and a final punch list, all handled by the licensed pros we connect you with.
Scheduling and Property Protection
A signed contract in Bellevue sets a start window rather than a start date, because crews are booking against a wet season that closes in gradually from October through May. Once a slot is confirmed, the licensed pros we connect you with typically call ahead to confirm dumpster placement, driveway access, and where ladders and material bundles will sit for the day. Homes on tighter lots near Wilburton or the 148th Avenue NE multifamily corridor often need this worked out before the truck arrives.
Property protection comes before anything touching the roof does. Tarps go down over landscaping, patio furniture gets moved or covered, and plywood or tarps commonly shield siding and windows near the eaves from falling debris. Garage doors and AC units get covered too. In neighborhoods with mature Douglas fir and cedar canopy, like parts of Bridle Trails or Somerset, the crew also clears low branches near the work area so the tear-off has a clean path without damaging the tree itself.
Deck inspection happens the moment tear-off clears a section, not after. The licensed pros we connect you with walk the exposed sheathing in Bellevue looking for soft spots, delamination, and old nail patterns before anything new goes down. Sound sheathing gets re-nailed to current spacing; damaged sections get cut back and replaced. This step decides how the rest of the job performs, since underlayment, drip edge, and shingles can only be as reliable as the deck holding them, whether the house sits near Bridle Trails or the Cougar Mountain slopes.
Tear-Off and Deck Inspection
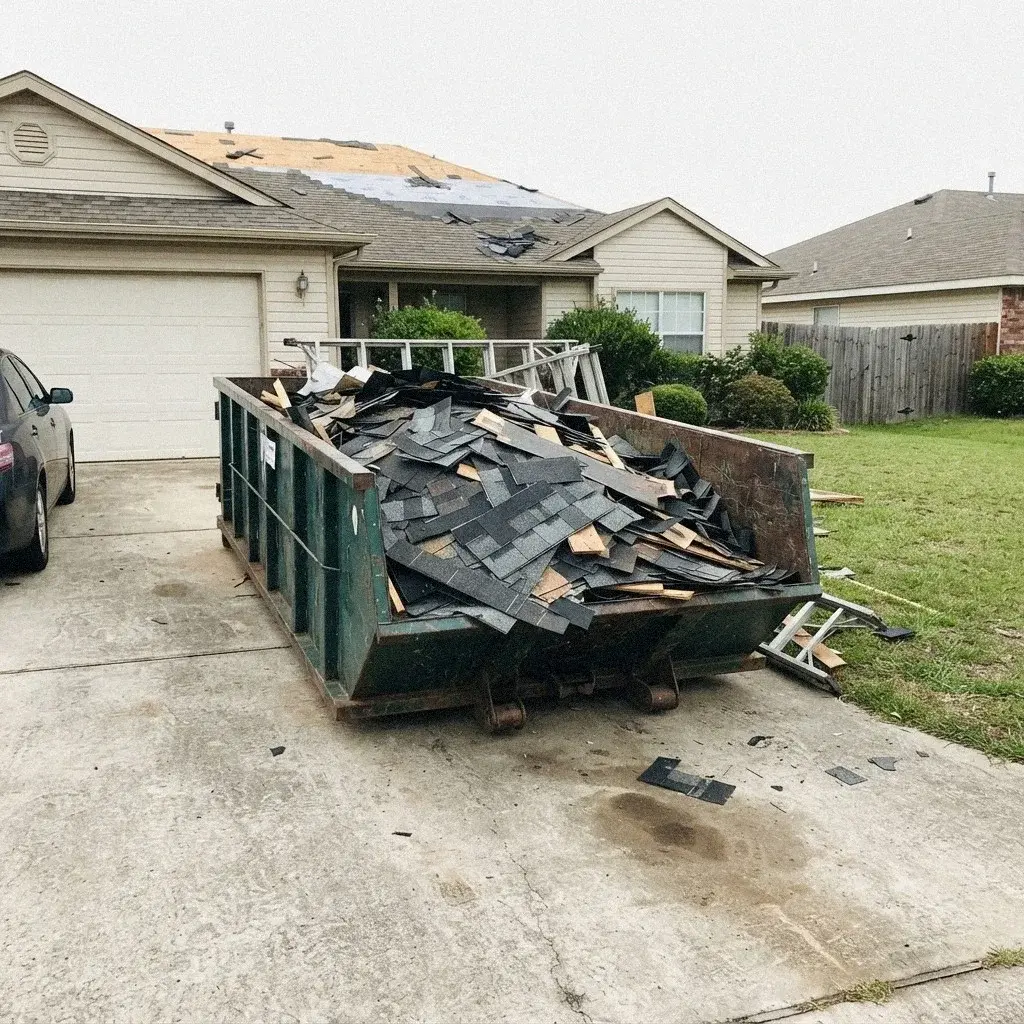
Tear-off strips the roof down to the deck, layer by layer, working section by section rather than opening the whole roof at once. This matters in Bellevue because an exposed deck during a sudden afternoon shower is a real risk even outside the heart of the wet season. Old composition shingle, old cedar shake, and any underlayment beneath come off together, and the debris goes straight into a staged dumpster rather than piling up on the lawn.
With the deck exposed, the crew inspects every sheet for soft spots, delamination, or water staining, since Bellevue's roof failures trace back to trapped moisture and poor ventilation far more often than any pest. Damaged sections get cut out and replaced, and the whole deck gets re-nailed to current fastening standards, since older homes were often built to lighter nailing patterns than current practice calls for. On a cedar-to-composition conversion, this step also means resolving skip sheathing, since composition shingle needs a solid nailing surface that open lath decking wasn't built to provide.
- Scheduling starts once the contract is signed, and the pros we connect you with will target a window during the drier months when a full tear-off can proceed without the roof sitting open to rain overnight.
- Property protection goes up before any material is removed: tarps over landscaping near the foundation, plywood or padding across walkways, and drop cloths against siding to catch falling debris from the old covering.
- Dumpster placement is set based on driveway slope and street access, which matters more on hillside lots in Somerset or Lakemont than on the flatter blocks near Crossroads or Factoria.
- Tear-off strips the existing shingles or cedar shake down to bare decking, exposing the sheathing so the crew can see what condition it is actually in rather than guessing from the attic.
- Deck inspection follows immediately, checking for soft or delaminated sheathing from trapped moisture, a common finding under older cedar shake roofs converting to composition shingle.
- Deck re-nailing corrects any panels that have worked loose over the years, since a properly fastened deck is what keeps the new underlayment and shingles performing once the roof is closed back up.
Underlayment, Flashing, and Penetrations
Synthetic underlayment goes down next as the roof's actual water barrier, since shingles alone are a moisture shell rather than a Bellevue home's real defense against a long overcast stretch. Drip edge gets set at the eaves and rakes first, giving water a controlled path off the deck instead of a place to work back underneath the first course. Starter course goes down along the eave line with its adhesive strip aligned to grip the field shingles above it.
Valley metal gets set wherever two roof planes meet, since valleys carry the concentrated runoff from both slopes and are one of the more common places a Bellevue roof lets water through years later. On homes with any grade change, like the daylight basement layouts common on hillside lots, correct valley work is what keeps that runoff moving toward the gutters instead of toward the foundation. This is also where the crew reworks or replaces any existing gutters and downspouts that tie into the valley outlets.
- Synthetic underlayment goes down first across the deck, giving a water-resistant layer that protects the house through the days it takes to finish the rest of the installation.
- Drip edge and a starter course go in along the eaves and rakes, setting the line that keeps water moving off the roof edge instead of curling back under the first row of field shingles.
- Flashing and valley metal go in at every place the roof plane changes or meets something else: chimneys, sidewalls, and the valleys where two slopes converge, since Bellevue's wet season punishes any gap in this work.
- Step flashing at walls and pipe boots at every vent penetration seal the small openings that cause the slow leaks common on older Bellevue roofs, well before the field shingles ever go down.
Field Shingles Through Ridge Cap
Flashing goes in around every place the roof plane breaks: chimneys, dormers, and the wall-to-roof joints where an addition meets the original structure. Step flashing gets woven course by course along vertical walls rather than run as one long strip, since a single piece can't follow the shingle overlap without opening a gap. This detail work happens before the field shingles go down over it, because flashing has to sit under the shingle layer to shed water correctly rather than sit on top of it.
Every pipe penetrating the roof, from plumbing vents to any exhaust stack, gets a new pipe boot sealed tight against the shaft. Old pipe boots are a frequent source of slow leaks in Bellevue homes because the rubber collar cracks with age long before the shingles around it show any wear. Skylights, where present, get their own flashing kit rather than a generic patch, and any roof penetration the crew finds during tear-off that wasn't visible from the ground gets flagged and addressed here.
| Stage | What Happens | Why It Matters |
|---|---|---|
| Tear-off and deck check | Drip edge, then starter course | Sets the line for every row above it |
| Open field | Field shingles, set nailing pattern | Bulk of the roof, worked eave to ridge |
| Flashing and penetration work | Valley metal under field shingles | Carries the heaviest water volume on the roof |
| Walls and pipes | Step flashing, pipe boots | Sealed as the field shingles reach them |
| Cleanup and magnetic sweep | Ridge vent, hip and ridge cap | Last piece installed, closes out the roof |
Laying the Field Shingles
Field shingles go on next, course by course, working up from the starter row with each course offset so the seams between shingles never stack in a line up the slope. The nailing pattern matters more here than the shingle brand, since underdriven or overdriven nails are a common cause of shingles lifting in the winter windstorms that come through the Eastside off the Pacific. Roof planes get worked in a set order so the crew isn't walking back and forth across finished sections.
At the ridge, hip and ridge cap shingles finish the roofline and cover the cut edges of the field shingles below. Where the design calls for one, a ridge vent gets set into the ridge to let attic air escape, which matters in Bellevue because trapped, humid attic air condensing against the deck is a documented cause of rot that has nothing to do with the roof surface itself. Getting attic ventilation right at this stage is part of why the deck stays dry for the life of the new roof rather than just the first few winters.
Cleanup, Sweep, and Punch List
Cleanup starts before the last shingle is even on, with debris going into the dumpster continuously rather than in one pass at the end. Once the roof is finished, the licensed pros we connect you with run a magnetic sweep across the lawn, driveway, and planting beds to pull up stray nails, since a dropped roofing nail in the grass near Kelsey Creek Park or any other yard is a hazard for bare feet, mower tires, and dog paws alike. Gutters get a final clean-out so the new roof isn't draining into last season's debris.
The punch list is where any leftover detail gets named and closed out: a flashing edge that needs a second look, paint touch-up where a ladder rested against the fascia, or a change order item from earlier in the job that hasn't been confirmed as done. Walking the property with the homeowner before calling the job finished is what turns a finished roof into a finished job. In Bellevue, where the next real test of the work is whichever wet stretch comes first, that final walkthrough is the point to raise anything that still looks unresolved.
The Replacement Sequence at a Glance
- Field shingles cover the main roof planes once flashing and underlayment are set, working from the eaves upward in overlapping courses that shed water down and off the roof.
- Hip and ridge cap shingles finish the peaks and hips, closing the top of the roof system where two field sections meet.
- A ridge vent is often cut into the ridge line during this stage, giving attic air a path out and reducing the trapped moisture that leads to rot in Bellevue's long overcast stretches.
- Cleanup follows installation, clearing torn-off material, packaging, and cut-offs from the yard and driveway before the crew leaves the property.
- A magnetic sweep of the driveway and surrounding ground catches loose nails that cleanup alone would miss, a step homeowners near Crossroads Park or Newport Hills notice most on paved surfaces.
- A punch list closes out the job, with any last items like touch-up paint or a loose vent cap addressed before final walkthrough, and any added scope handled as a separate change order rather than folded in unnoticed.
Frequently Asked Questions
How long does a crew stay on-site each day?
Dumpsters usually sit in the driveway or street in front of the house, wherever the crew can load debris straight off the roof without carrying it across the yard. On narrower streets or shared driveways, like parts of Wilburton or the 148th Avenue NE corridor, placement gets worked out with the homeowner before the start date so it doesn't block neighbors or emergency access.
What happens if my deck is rotten underneath?
Dumpster placement in Bellevue depends on the lot. Driveway placement is common on Somerset and Cougar Mountain hillside lots where street access is tight, while flatter Crossroads or Lake Hills properties may allow street-adjacent placement. The crew plans placement during scheduling so tear-off debris has a short path from roof to bin.
Will they protect my landscaping and driveway?
Re-nailing addresses decking that has loosened or shows nail pull-through once the old covering comes off, which is common on older Bridle Trails and Somerset homes with decades of moss-related moisture cycling. The crew re-nails to current pattern before underlayment goes down, since skipping this step undermines everything installed above it.
What's a magnetic sweep and why does it matter?
A magnetic sweep pulls loose roofing nails and staples off the driveway, walkways, and lawn after tear-off, since a stray nail left in a Newport Hills or Factoria driveway becomes a flat tire or a bare foot injury later. It happens after cleanup, before the crew leaves the property for the day.
What is a punch list and when do I get one?
A punch list is the walkthrough tally of small items left after main installation, things like a bent ridge vent cap or a missed paint touch-up near a pipe boot. On a Bellevue reroof it gets resolved before the job is called complete, separate from any change order for added scope.
Ready to schedule your Bellevue reroof?
Ready to see this sequence run on your own roof? Tell us about the job and we'll connect you with a licensed local pro.
Call (425) 380-0932